
Traditional American Sponge Cake - Oil, Butter, & Dairy Free!
By Zeina Haddad
Published:

Hi there 👋 I’m Zeina Haddad. I believe that food doesn't need to "look perfect", but to "taste more than perfect"! As author of “My Mama Knows Best!”, I share authentic Lebanese and global recipes. My Promise to You: 100% AI-Free recipes. Every dish is written by me, tested by me, and tasted by my family. Join me in celebrating the joy of slow, intentional cooking.
Not Every Cake Needs Butter or Oil to be Amazing!
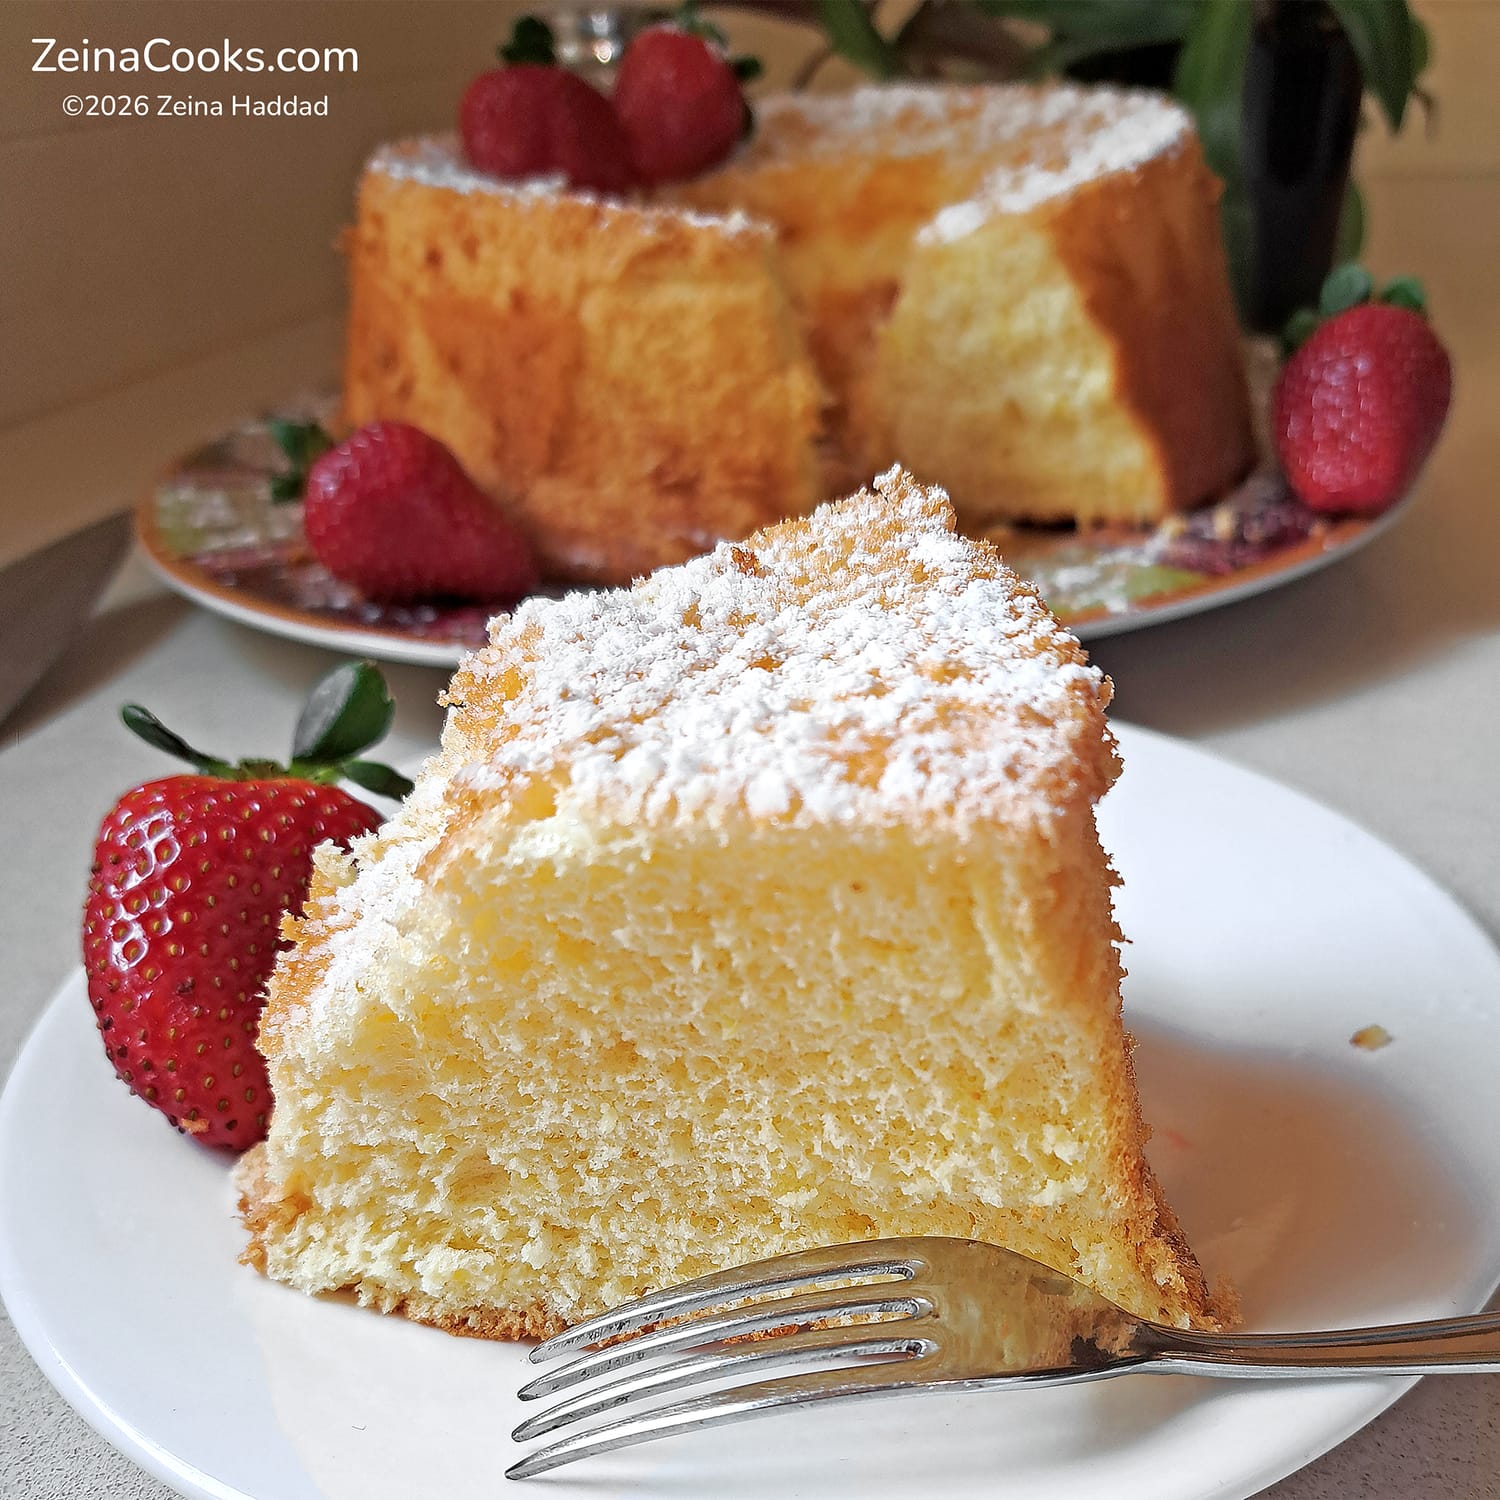
Have you ever wondered what an edible sponge would feel like? Even if the thought never occurred to you, you must try this recipe to find out! This cake looks and feels in your hand like an actual sponge 🧽, stays light as a feather ☁️, and has a soft, melt-in-your-mouth texture that is simply delicious 😋.
Follow this recipe that is both quick to make and professional.
This specific recipe relies on foamy eggs for the rise, with just a touch of baking powder to help it along. We don't grease the pan — this allows the batter to "climb" the walls for maximum height. Because there is no added fat, the cake remains incredibly airy and is naturally dairy-free without compromising on flavor.
While our version features a bright citrus zest, you can easily swap it for pure vanilla if you prefer a more neutral base.
❗ Pro Tip: The cake is so much like a real sponge that it is best cut using a serrated knife to avoid squishing the airy structure.
So scroll down for the step-by-step tutorial 📝
Key Ingredients & Composition
To achieve that signature height, here is what makes the American Sponge Cake special:
Foamy Eggs: The whites and yolks are beaten separately to incorporate maximum air. This is what makes the cake feel weightless. (💡 Ensure eggs are at room temperature to achieve the best volume.)
The Sugar Ratio: Sugar isn't just for sweetness; it stabilizes the air bubbles. We don't recommend reducing the sugar by more than 25%, but we’ve included the safe minimums in the notes below.
Cake Flour: Low-gluten flour ensures a tender crumb. If you don't have any, a mix of all-purpose flour and cornstarch works perfectly.
Greaseless Pan: Avoid non-stick pans, and do not grease the pan at all! The batter needs to grip the sides of the pan to rise higher.
The Flipping Method: To prevent the cake from losing height, it must be inverted immediately after leaving the oven.
How to Serve
🥄
American Sponge Cake is considered a casual cake. It takes little effort to prepare and you don't need to fuss about its appearance.
Serve it plain: It's flavorful enough to eat on its own with a cup of tea.
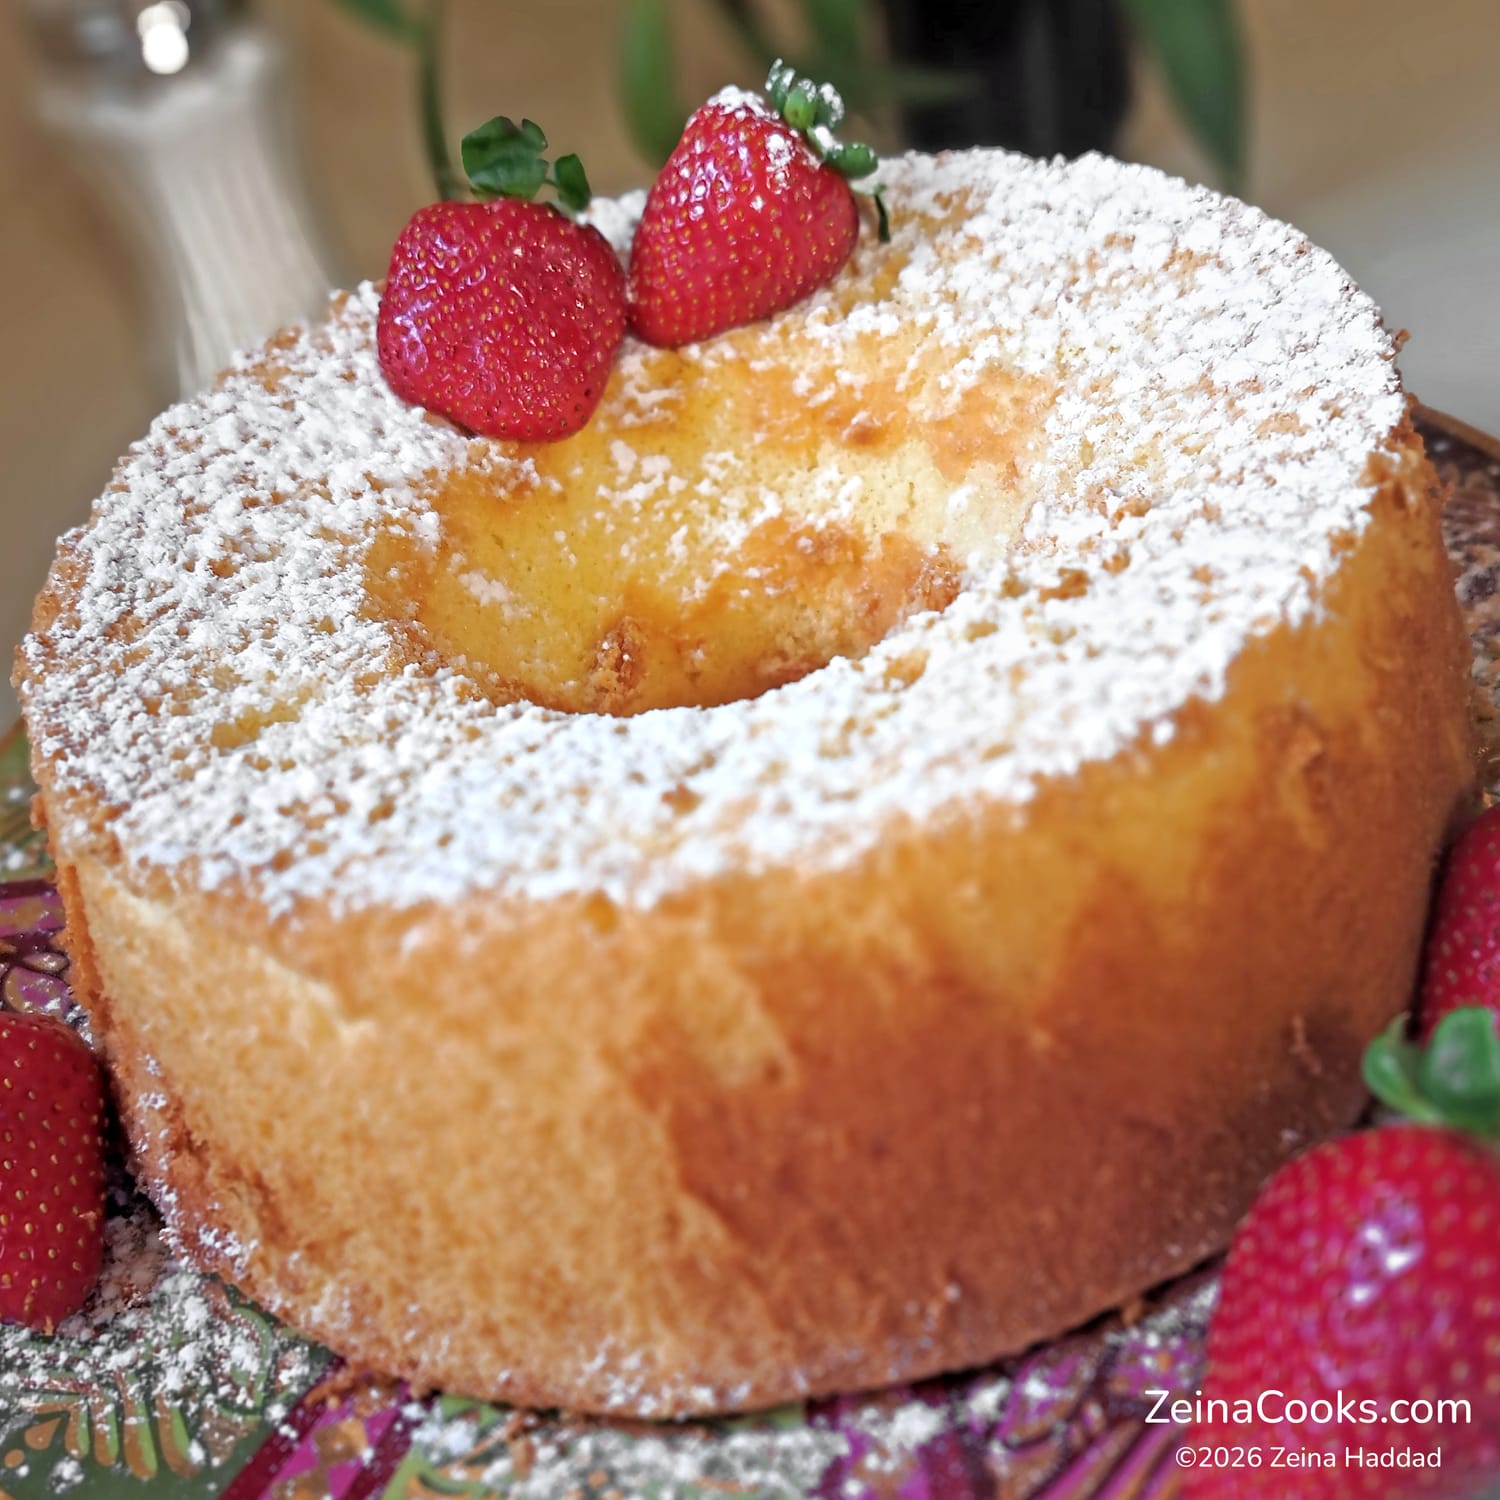
Dust with powdered sugar: For a classic elegant look.
Fresh fruits or fruit jams: Particularly strawberries and raspberries go well with it.
Vanilla whipped cream (chanitlly cream — the cream that goes with everything 😉): You can serve a dollop of whipped cream on the side or slice the cake in half and fill it!
How to Store
📦
Because this cake has no added moisture, it can dry out fast. Here's how to keep it moist and soft:
At Room Temperature: Keep in an airtight container for up to 2 days.
In the Fridge: If you've filled it with cream or fruit, store it in the fridge for up to 4 days (wrap it well with plastic wrap to avoid it from absorbing fridge smells).
Freezing: This cake freezes beautifully! Wrap slices in plastic wrap, then foil; it stays fresh for up to 3 months. Thaw at room temperature before serving.
Troubleshooting: Why Didn’t My Sponge Cake Rise?
⚠️
Sponge cakes rely on air rather than fat. If yours didn't turn out perfectly, it’s usually down to one of these three common culprits:
1. The Cake Slipped or Shrank
You might have used a non-stick pan or greased the sides.
Remember not to do that next time; this batter needs to climb the walls of the pan! If the walls are slippery, the cake can't hold its height as it cools and will slide down or shrink significantly. Next time, leave the butter and spray in the cupboard.
2. The Cake is Dense or Rubbery
The Cause: Over-mixing or losing your bubbles. When folding the egg whites into the yolks, be as gentle as possible. Use a "figure-eight" motion. If you stir vigorously, you pop the tiny air bubbles you worked so hard to create. Also, ensure your flour is sifted; lumps will tempt you to over-mix!
3. The Cake Collapsed in the Middle
It either wasn't fully baked or wasn't inverted soon enough.
Do The Skewer Test: Ensure a skewer comes out clean or with just a few dry crumbs. If it's even slightly wet, it needs 2–3 more minutes.
Flip the cake the second it comes out of the oven. If it stays upright, the weight of the warm crumb will crush those delicate air cells before they have a chance to set as they cool.
4. My Egg Whites Won’t Reach Stiff Peaks
There's a trace amounts of fat or yolk. Egg whites are "fat-phobic". Ensure your bowl and whisk are completely dry and free of any oil residue. Even a tiny speck of yolk getting into the whites will prevent them from fluffing up. If you struggle with this, wipe your bowl with a paper towel dipped in a little lemon juice before starting.
Pro-Tips for a successful American Sponge Cake
🧐
Room Temperature Eggs: Eggs whip better when at room temperature, yet it is easier to separate them while cold. Once you separate them, cover them, and allow them to come up to room temperature.
Shake Your Eggs: Before breaking an egg to separate it, shake it a little. This will release the egg white from the shell, and it will slip out of the shell much easier.
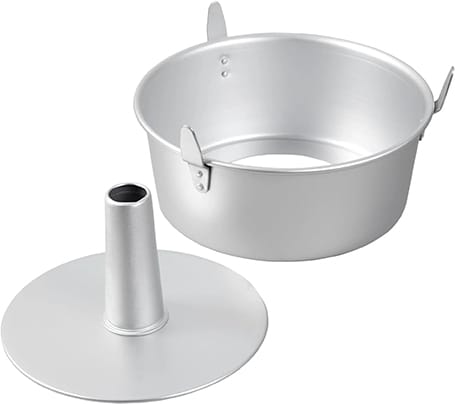
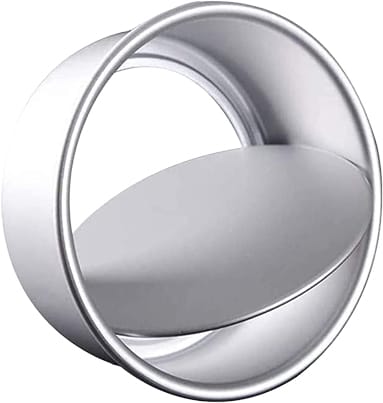
Two-Piece Tube Pan: The inner hole of the tube pan allows the cake to rise quicker from within. You can however use a regular pan. Only make sure your pan has a removable bottom, or it would be very difficult to release the cake from it since you will not grease it.
Not Non-stick Pan: This is not only important for allowing the batter to cling to the side of the pan in the oven, but also to prevent the cake from slipping out from the pan when you invert it after baking. If however your pan is non-stick, invert it onto a wire rack.
The Secret to the Cloud ☁️: The 'lift' comes entirely from the air you beat into the eggs. When folding the whites into the yolks, use a whisk, a large metal spoon, or a silicone spatula and move in a "figure-eight" motion. If you stir in circles, you'll pop those tiny bubbles and lose that signature sponge texture.
In Pictures: How to Make American Sponge Cake
📝 The Ingredients
Before we start, let's look at what makes up this sponge:
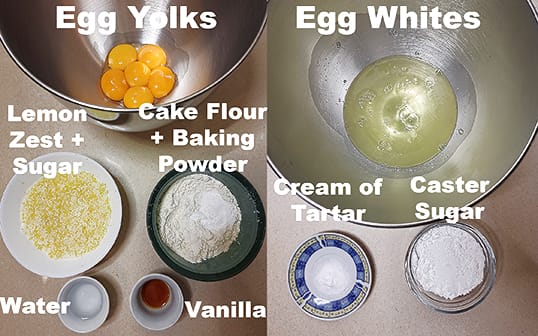
▪ Eggs yolks & whites: Separate them while cold (it’s easier!), then cover and let them reach room temperature for maximum volume.
▪ Lemon Zest: Zest of 1 large or 2 medium lemons. You can also use orange zest for a warmer flavor.
▪ Yolk Sugar: Granulated or caster sugar both work here. Pro-tip: Rub the zest into the sugar first to release the aromatic oils.
▪ Cake flour: This low-protein flour reduces gluten, resulting in that signature soft crumb.
No cake flour? Mix 90 g all-purpose flour with 10 g cornstarch.
▪ Water: Helps the sugar dissolve and creates steam for a higher cake rise.
▪ Vanilla Extract: For that classic bakery aroma.
▪ Cream of tartar: For the meringue; it helps the egg whites foam up and stay stable. (Substitute with lemon juice or vinegar if needed).
▪ Caster Sugar for the meringue: Caster sugar dissolves faster. If you use granulated sugar instead, beat it longer until all the sugar is dissolved. To check, rub a little of the mixture between your fingers, if there's still grittiness then the sugar is not all dissolved and you need to beat more.
🥣 Step-by-Step Tutorial
1️⃣ Let's start by prepping the pan. Which ever pan you use, these are "must" requirements:
1. The pan should not be non-stick, and do not grease it. The batter needs to grip the side of the pan to climb it.
2. The pan must have a removable bottom, since we won't be greasing it. Otherwise, it would be impossible to release the cake from it intact.
We'll be using a 10 inch tube pan. It is ideal because the center hole circulates heat to the middle of the cake for a higher rise.
Since we will be inverting the cake after baking, I recommend this tube pan with cooling feet. It makes the inversion process much safer and ensures your cake stays airy while it cools!
If you prefer however using a standard pan, I recommend this 9 inch round pan with a removable bottom. Only keep in mind that the baking time may be a few minutes longer.
2️⃣ In a stand-mixer with the paddle attachment, beat the egg yolks, sugar, and zest on high speed until light, pale, and fluffy. Add in the vanilla extract and water and beat to incorporate.
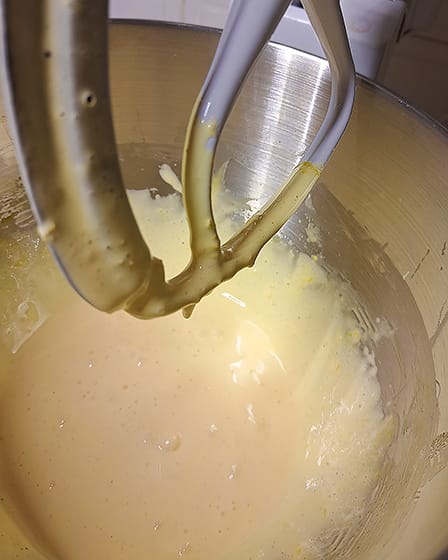
❗ Stop and scrape the sides of the pan with a spatula every now and then, or use a paddle attachment with a silicone edge like this one (to make your life easier 😉).
❗ Important note: Never let raw egg yolk and sugar sit together long without whisking! The sugar will actually "cook" or burn the eggs, creating lumps that won't dissolve.
3️⃣ Prepare the meringue: Transfer your yolks to a separate bowl and clean your the stand-mixer bowl, or just use another one. Put your egg whites and cream of tartar in the clean bowl, and beat with the whisk attachment on medium low speed until frothy. Increase to medium high speed, and add the caster sugar one tablespoon at a time until stiff peaks form.
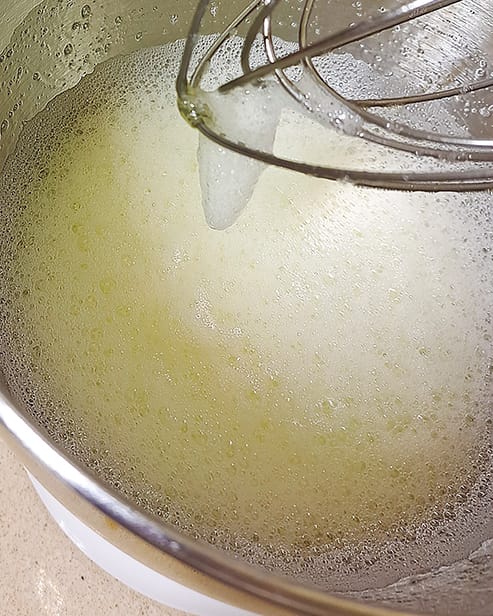
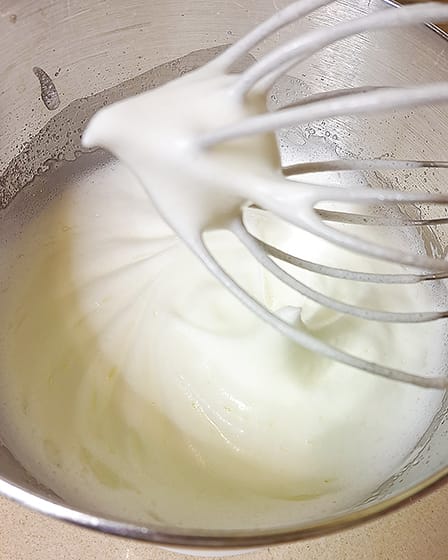
❗ Important note: The stand-mixer bowl has to be clean of any fat and comletely dry or the egg whites won't whip properly.
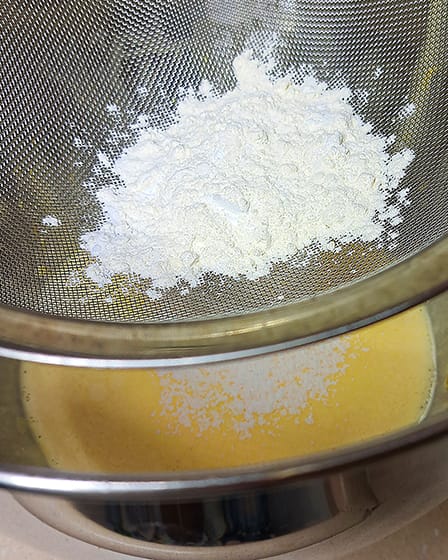
4️⃣ Sift the flour mixture into the egg yolks in 3 additions, and fold it in. Be firm but gentle to avoid deflating the eggs too much.
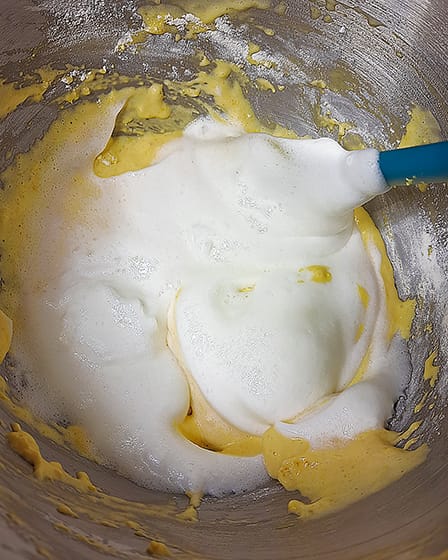
5️⃣ Fold a large spoonful of the egg whites into the yolk mixture to lighten it, then gently fold in the remaining whites. Move in a "figure-eight" motion (don't stir), or you'll pop the bubbles!
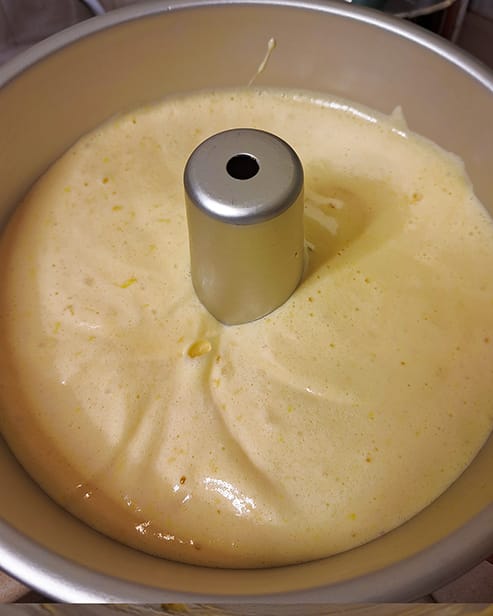
6️⃣ Pour the batter into the ungreased pan, and bake at 350 °F for 29–33 minutes until a skewer inserted into the cake comes out clean.
If you're using a 9-inch round pan instead of a tube pan, the center may take a little longer to set. Start checking at the 30-minute mark!
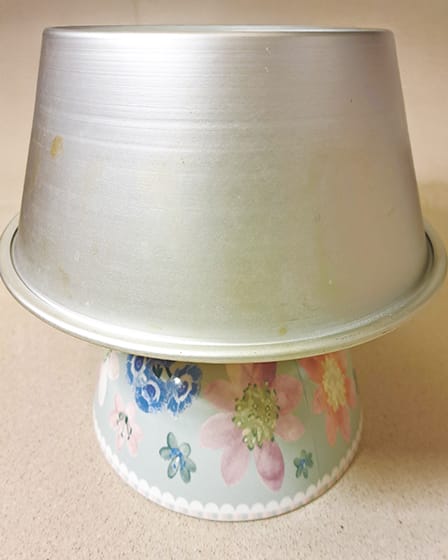
7️⃣ Remove the cake from the oven and immediately invert it. It your pan doesn't have feet, balance it on an upside-down bowl like I did in this picture. This prevents the cake from collapsing as it cools.
Another way would be to rest the edges of the pan on three upside-down mugs or glasses of equal height. This works too if you're using a standard round pan.
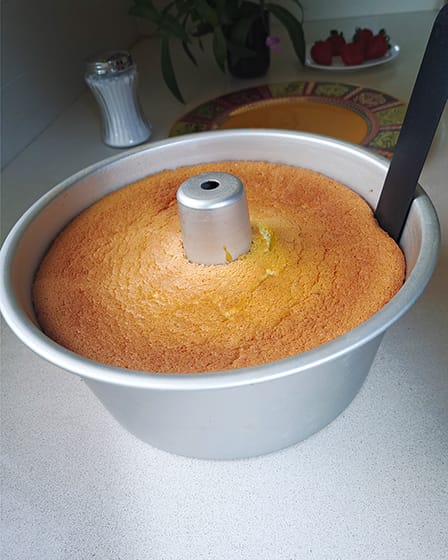
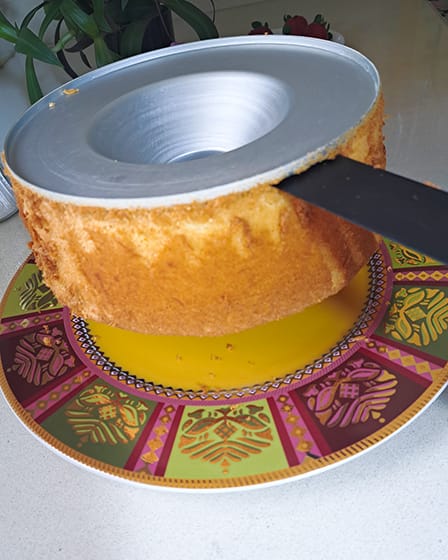
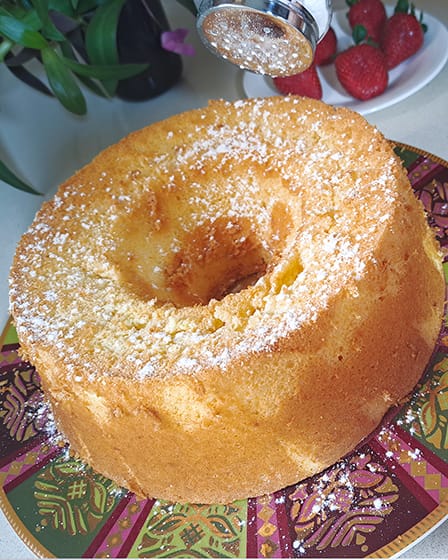
8️⃣ Once completely cool, release the cake from the pan by running a knife or thin spatula along the pan's outer edge and inner tube, and along the bottom of the pan. Release it onto the serving dish with its bottom facing up for a perfectly flat top. Dust with powdered sugar if desired.
Frequently Asked Questions:
Yes! If you don't have cake flour, you can make a DIY version. For every 100 g of flour needed, use 90 g of All-Purpose flour and 10 g of cornstarch. Sift them together three times to ensure they are perfectly combined. This mimics the low-protein structure of cake flour.
Absolutely. While lemon is classic, orange zest makes for a beautiful, floral sponge. You can even use lime zest for something a bit more tropical. If you want a plain vanilla cake, simply omit the zest and increase the vanilla extract to 1 tablespoon.
Cream of tartar is used to stabilize the egg whites. You can substitute it with an equal amount of lemon juice or white vinegar. It provides the same acidity needed to keep the air bubbles strong.
Since this recipe has no oil or butter, a small amount of water provides the necessary moisture to help dissolve the sugar and create steam in the oven, which assists with the rise.
I wouldn't recommend it for this specific recipe. Sponge cakes need the high walls of a pan to climb. In a cupcake liner, they often pull away from the sides and shrink, resulting in a tough, rubbery texture rather than a light sponge.
Not quite! A Chiffon cake actually contains oil. This is a Traditional American Sponge, which is even lighter because it is completely fat-free.

Traditional American Sponge Cake - Oil, Butter, & Dairy Free!
🍴 Dessert
🌍 American
Yields:
10 servings
A classic, airy sponge that defies gravity without a drop of oil or butter. Perfect for tea time, berry shortcakes, or eating straight from the pan!
Ingredients
Instructions
1.
Prep: Pre-heat oven to 350 °F (180 °C). Do not grease your 10 inch (25 cm) two-piece tube pan, or your 9-inch (23 cm) round pan with a removable bottom (the batter needs to 'climb' the ungreased walls to rise).
2.
Dry ingredients: Mix together the flour, baking powder, and salt.
3.
Flavor Sugar: Using a fork, mix the citrus zest into the 135 g of yolk sugar.
4.
Beat Yolks: In a stand-mixer (paddle attachment), beat yolks with citrus sugar on high speed until light, pale, and thick. Add vanilla and water; beat to incorporate.
5.
Beat Whites: In a clean stand-mixer bowl (whisk attachment), beat whites and cream of tartar on medium low speed until frothy. Increase to medium high speed, and add 65 g of whites sugar, one tablespoon at a time, until stiff peaks form.
6.
Add Dry Ingredients: Sift the flour mixture over the yolks, and gently fold it in, in three additions.
7.
Add Whites: Fold a spoonful of egg whites into the yolks to lighten, then gently fold in the remaining whites using a figure-eight motion until no streaks remain.
8.
Bake: Pour batter into ungreased pan, and bake for 29–33 minutes (or 30–35 minutes if using a regular pan). Test doneness with a skewer.
9.
The Invert Trick (Crucial!): Immediately upon removing from oven, flip pan upside down.
💡 Tip: If your tube pan doesn't have 'feet', you can balance it on an upside-down bowl. Or if you're using a regular pan, not a tube pan, you can rest its edges on three upside-down mugs or glasses of equal height. This allows air to circulate underneath so the cake doesn't get soggy while it hangs.
10.
Release: Once completely cool (about 1–2 hours), run a thin, flexible offset spatula or a thin knife around the edge (don't forget the inner tube of the tube pan as well). Push the bottom of the pan up to release the cake, then carefully slide the knife under the cake to release it from the base and turn the cake on a serving dish with the bottom facing up. Dust with powdered sugar and enjoy!
Nutrition
Serving Size: 1 slice
Calories: 157 Kcal | Fat: 3 g | Saturated Fat: 1 g | Carbs: 28 g | Sugar: 20 g | Protein: 4.5 g | Fibers: 0.2 g
Nutritional information is based on third-party calculations and should be considered an estimate only. Actual nutritional content will vary based upon brands used, measuring methods, cooking method, portion sizes, and more.
Notes:
1. You can reduce the yolk sugar to a minimum of 100g.
2. You can reduce the white sugar to a minimum of 50g.
3. If using granulated sugar for the whites, beat longer to ensure it dissolves (test for grittiness between your fingers).
Leave a Review
Your email address will not be published. Required fields are marked *
Select a rating *

DISCLOSURE: As an Amazon Associate, I earn from qualifying purchases. My posts may contain affiliate links, which means I may receive a small commission, at no cost to you, if you make a purchase through a link. This helps support the blog and allows me to continue creating free recipes and content for you.
I only recommend products, tools, and ingredients that I personally use, or reviewed and trust. My opinions are always my own.

All rights reserved
©2025 – 2026 Parsley Me This! by Zeina Haddad
Recent Reviews: